The Gallery Wall Guide (Fit for RVs)
The Gallery Wall Guide (Fit for Rvs)
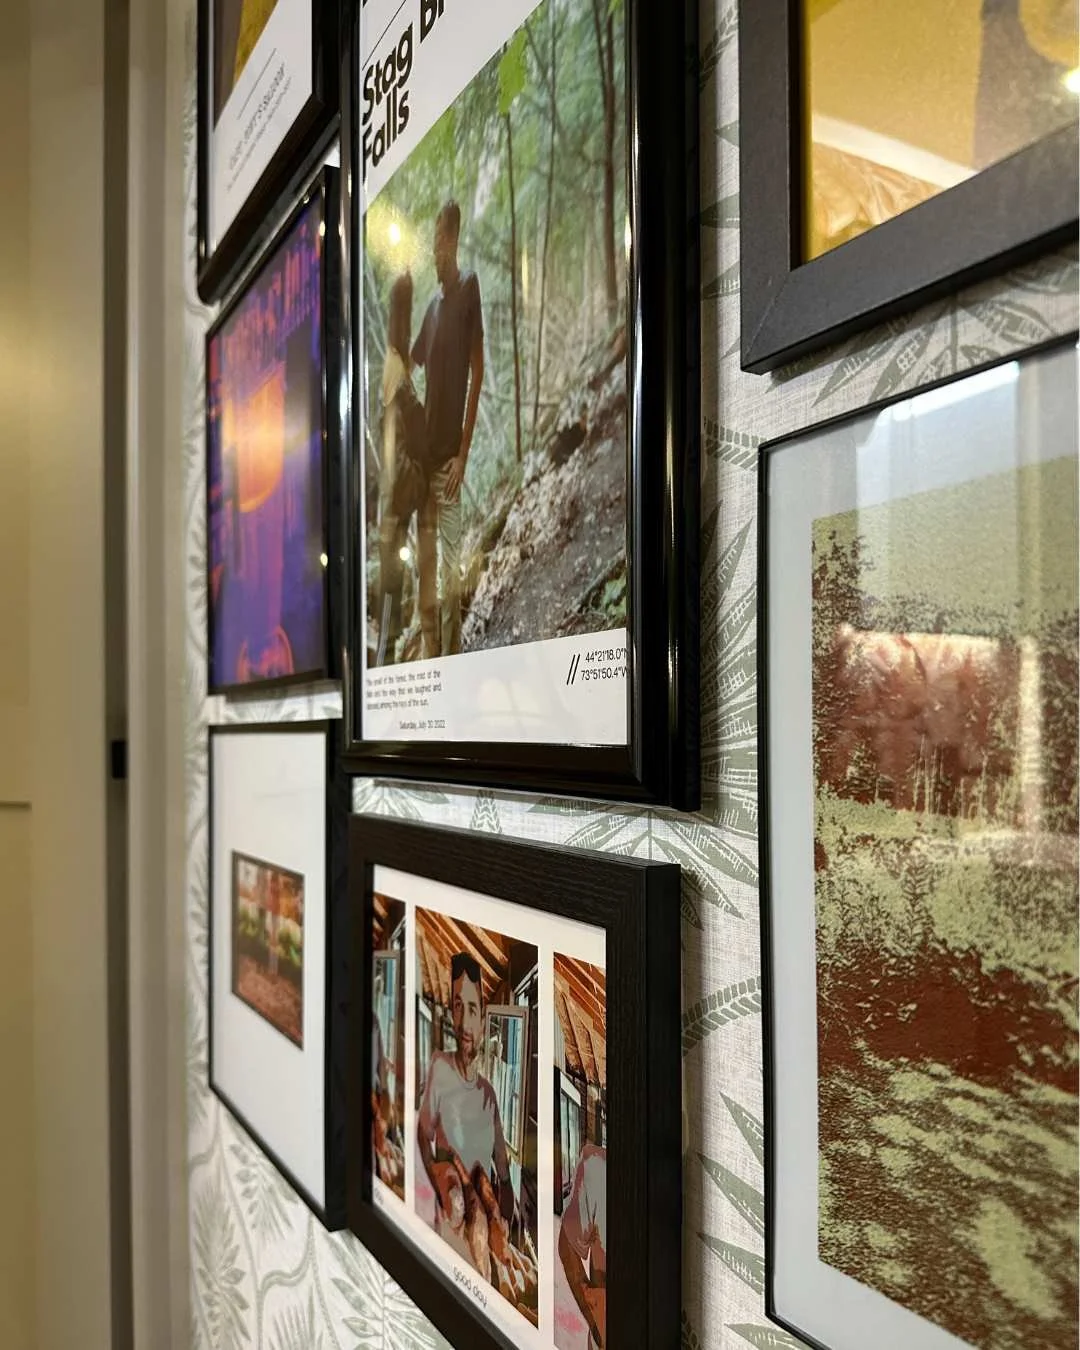
As we continue settling into our new RV, I have been slowly adding personal touches throughout it to help it feel more like home. I’m excited to share my most recent project that I finished - our new gallery wall.
After being on the road, traveling full-time in our RV for over 3 years, you can imagine how many photos we’ve taken with all of the memories we’ve made. There’s just one problem…
Our new RV, while larger overall, has more windows and less wall space than our last one. This meant that after unpacking all of my frames from our first RV - I realized that most of them weren’t going to fit in this one. Luckily, I enjoy a challenge and an excuse to start with a clean slate. Our new Brinkley z3100 has a short, windowless, hallway going upstairs, and this made the perfect space for a travel gallery wall.
Since sharing this project on our Instagram, we’ve received several questions about how to make a gallery wall, and especially how to make a gallery wall that is also RV friendly.
In this post, I’m sharing:
What is a Gallery Wall?
5 Tips for Creating a Gallery Wall
Gallery Wall Supplies (that are also RV decor friendly)
7 Free Gallery Wall Layouts to Inspire Your Own Gallery Wall Build
Travel Gallery Wall Inspiration
What is a Gallery Wall?
So what is the difference between a gallery wall and a wall of photos?
Technically, not much. By definition, a gallery wall is essentially a collection of framed artwork, photographs, and personal memories that are hung closely together in a grouping.
Visually, the primary difference might be that an intentionally planned gallery wall is typically planned in a way that the artwork itself creates some sort of focal point. This could be anything from a large piece of art that anchors the center point, to a clean line break carried the length of frames, just as an example.
5 Tips for Creating a Gallery Wall
1 | Find the focal point for your gallery wall
Your focal point could vary depending on where your gallery wall will hang.
For example, in our case - the gallery wall is displayed on a wall approximately 7 feet tall by 4 and a half feet wide, so my focal point is central to this space by height and width.
On the other hand, if you were working with a long hallway you might opt for the focal point to be a centered line of photos that ran the length of the hall. Identifying the focal point of your gallery wall according to what your space allows, will help you choose the most appropriately-sized artwork.
2 | Curate a theme for your gallery wall (or don’t)
As with any home decor, the more reflective it is of your personal style, the more satisfied you will be with the results, and the more like home it will feel. You do not need to over-index on creating a theme for your gallery wall, but as a guideline, it can help you to narrow down elements that work well together.
For example, you might consider doing a gallery wall of family photos, vintage posters, a variety of art types all in different, bold-colored frames, photos from your travels, or a mix of everything in between.
Where you are mixing different styles, it is best to create balance by repeating each one 2-3 times throughout your gallery wall layout.
There are no hard and fast rules for curating your collection, but finding points of commonality will help to tie it together.
3 | Choose gallery wall frames
When it comes to our own RV decor, I prefer to blend decor styles together to help create more of a “lived-in” feel. So when it came to creating our gallery wall, I knew that I wanted to use a variety of art types to make it feel like pieces I had collected over time. I also wanted to add a bit of a modern touch, so I used sleek, black frames for all of the pictures.
If you plan to use a blend of frames, it’s typically best to choose 2-3 different types, and then use each type 2-3 times in your gallery wall. For example, you might use gold ornate frames, aged wood frames, and bright-colored frames altogether. You would want to use 2-3 of each style of frame, spacing them out throughout the gallery wall design.
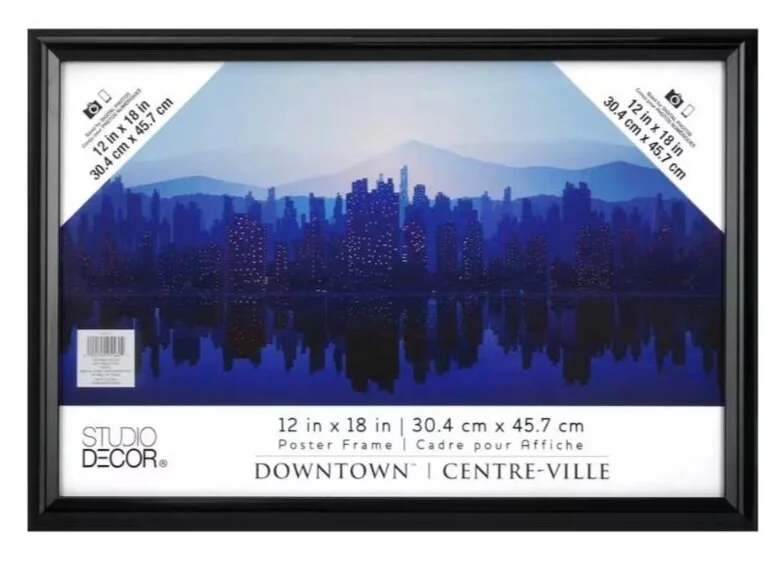
When creating a gallery wall, it's important to decide on the size of frames you want to use. This choice may be influenced by space limitations. For instance, I knew I wanted to work within a narrower space from left to right, so I chose frames that were taller and narrower, such as 11x17 and 12x18.
If I'm using frames larger than 11x14, I tend to avoid including any smaller than 8x8, as they can look haphazard or like an afterthought. Whether you're going for a perfectly symmetrical display or a more eclectic mix of frames, the size of your frames will play a key role in achieving your desired look. (Scroll down to shop the frames we use in our own Gallery Wall)
I find that choosing your frames is easiest once you have determined your focal point, and when you have identified the pieces you will be using in your collection.
4 | Plan the layout for your gallery wall
Before you begin hanging your gallery wall, I recommend planning your layout using a large open space like the floor, or a table. When placing the frames, you want to start with your focal point frames. If you are working frames in rows, you should start with the middle frames, and if you are working with a variety of frames, you would start with the larger focal point art and build outward. Visually, plan to balance colors, frame styles, or sizes and each time you add a frame to your layout, try to line it up with a previous frame to create clean line breaks.
TIP: Scroll down to the bottom of this page to see our 7 Gallery Wall Layouts to Inspire Your Gallery Wall Build
Once you have your frames laid out to your liking, snap a picture with your phone or camera. This will be helpful once you start to hang the frames, so you can reference the layout as you go. You might think you will remember exactly how things were, but as you start to remove frames from the layout it can become confusing.
5 | Measure twice, hang your gallery wall once
When you are ready to hang your art, you should start with the focal point art first, ensuring that any frames that will be placed above, below, or to the sides will fit in the space where you are planning.
Check to make sure your frames are level as you hang each one, and use a measuring tape to keep spacing consistent between them. Step back and assess the progress often, because it can look very different from varying points of view.
TIP: To assist with the placement of photo hangers, you can apply a strip of masking tape to the back of the frame, and mark where the hanger is with a pen or pencil. Take that same strip of masking tape and apply it to the wall where you plan to hang the frame, and you can add the nail or hanger to the marked spot and then remove the tape.
Gallery Wall Supplies (that are also RV friendly)
RV decor must always take into account weight and mobility. Every RVer needs to be concerned about cargo weight since even the smallest items, from clothing to a soda can, can add up over time.
To help maintain the weight of our decor, I prefer using frames made of lightweight materials like plastic instead of glass. When searching for 'poster frames', I usually come across some great options for such frames. Opting for lightweight frames also makes it easier to prepare for travel days, because they are easier to secure in place, so we don’t have to take them down each time.
Command Strips to Hang Gallery Wall Frames in an RV
When it comes to RV decor and mounting picture frames in an RV, we highly recommend Command Velcro Strips. There are several different types of Command Strips, but the Velcro strips seem to hold up the best when it comes to bumpy roads.
I like to spread the strips out depending on the size and weight of the frame, to help offset how much weight will be “pulling” at any one spot. Oftentimes I will use 4 strips, one on every side of the frame, or for larger frames 11 inches and up, I will use two on each longer side and one on each of the shorter sides.
There is something both satisfying and assuring when you hear the sound of Velcro clicking together as you mount the frame to the wall.
Know This: If you have peel-and-stick wallpaper in your RV, it is important that you let it cure for at least 2-3 days before adding any weight to it (like from picture frames hanging by Command Strips that are attached to the paper).
Once you mount a frame with Command Strips to peel and stick wallpaper, you want to avoid moving it around for at least 2-3 days. If, after 2-3 days you need to move it, it’s best to use something to apply pressure towards the strip attached to the wallpaper, as you pull the frame away from it. This will reduce any pull on the paper that could cause it to come away from the wall.
Peel + Stick Need to Know
Are you considering installing Peel + Stick Wallpaper in an RV?
Get started with tips from our blog:
RV Gallery Wall Mounting Supplies
Aside from lightweight frames and Command Velcro strips, a bubble or laser level, a measuring tape, and painter’s or masking tape.
7 Free Gallery Wall Layout Templates to Inspire Your Gallery Wall Build
Travel Gallery Wall Inspiration: Gallery Walls in RV Decor
To help inspire your gallery wall, we’re sharing a couple of our favorites from the RV community. Traveling gallery walls are absolutely possible, with some planning and patience as you add your personal touch to your RV decor.
@jokotravels’ Travel Gallery Wall is so stunning, and we love the way that she used a series of photos from one incredibly epic photoshoot. Aside from the symmetry, using photos in one colorway can help create balance in the larger space, too.
@behrnecessitiesrv’s RV Gallery Wall stole the spotlight on her feed when she updated the pictures each season. We never would have considered repeating the same image on our gallery wall until now!
For the decor in our RV bedroom, we used a series of smaller frames and a variety of art styles to create an eclectic gallery wall.
@venturesinadventure’s Gallery Wall is so cozy and makes us feel right at home in their RV. This is a great example of how you can not only use decor aside from frames but how to balance the height of your wall with other items like a side table and plants.
Here’s an example of how we used a combination of picture frames and a slat wall feature to build the offset gallery wall with a large anchor frame and smaller frames. This was in our Grand Design Imagine.
You can spy a peak of the gallery wall in our Brinkley z3100, which is mounted in the hallway, outside of our bedroom door.
WE WANT TO HEAR FROM YOU
Now that we’ve covered all the basics of creating your Gallery Wall, from inspiration to installation, you’re ready to install your own! Let us know if you have any questions, and tag us on Instagram @stairsuphandlein to show us your finished Gallery Wall!
WANT TO SAVE THIS POST ? PIN FOR LATER
Speaking of extra …
Are you looking for RV decorating ideas and inspiration to start turning your RV into a cozy, comfortable tiny home?
Shop our curated “How to Make Your RV Feel Like Home” idea list


We’re Jen + Eric
After falling in love with everywhere we went, we changed our lives and became full-time RVers.
In the past 3 years, we’ve visited over 20 states, remodeled our first RV, hiked miles of trails, and proved that minimalism is in fact
NOT a pre-requisite for RV living.
Stick around, because we’re sharing everything
from how to get started, our learned experiences,
and most important …
how to make RV life a little ✨ EXTRA ✨